How to Create Customized Dividers for Your Binder
3 minutes DIY project
Ella
8/17/20241 min read
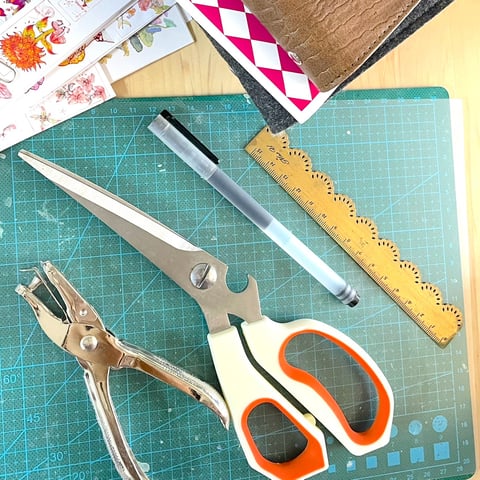
Selecting the Right Material
One of the most effective ways to organize your binder or notebook is by using customized dividers. To start, select the materials for your dividers, here I am using the plastic film, which is transparent and soft. Options like colored printer paper or card sheets are also great choices as they are vibrant and sturdy. It is essential to ensure longevity and durability as you flip through the sections of your binder.
Creating Holes for Insertion
Once you have your dividers ready, the next step is to use a hole punch to make holes along one side of each divider. This step is crucial as it allows you to insert the dividers into your binder or notebook. Make sure that your hole punch matches the exact layout of the binder rings to ensure a perfect fit. Misaligned holes can result in sloppy dividers that may tear easily.
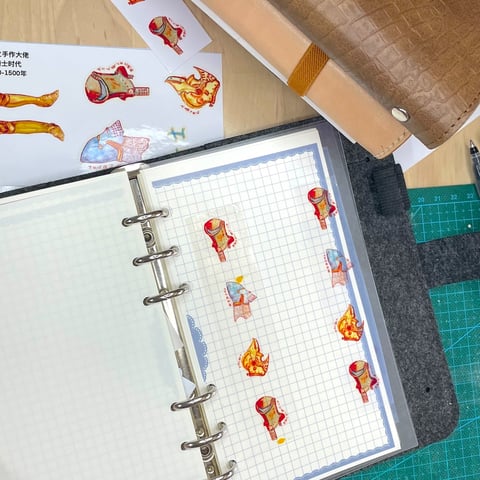
Labeling the Tabs
A well-organized binder is incomplete without labeled tabs. Cut out small rectangles from white cardstock and label each one according to the sections you want to create. Use a fine-tip marker or printer labels for a neat and professional look. Once labeled, attach each tab to the appropriate divider. This will make it easier to navigate through your binder and locate the information you need quickly.
Final Assembly
After labeling, it is time to set the dividers in place. Simply slot them into the binder rings, making sure each divider aligns properly with the others. Test the functionality by flipping through the pages to see if the dividers stay intact and provide the organization you need.
Step by Step Video